If you want to order the manual just send me a mail: please mention your address as well! info@spoerl-online.de

The first "stone": 22.06.2007
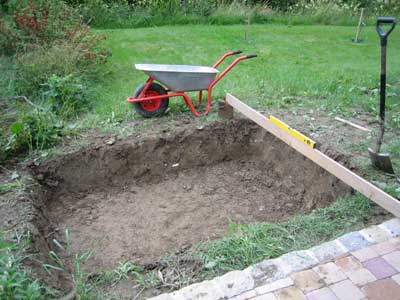
First the substructure of the floor slab.
And not to be misunderstood: everything done by hand

The blinding layer is quite important in Bavaria, as temperatures of
-10 to -20 degrees below zero are quite "popular" each winter.
15 cm "Wandkies" + 10 cm "Quetschsand" (sorry folks I don't know the
exact translation of these terms)
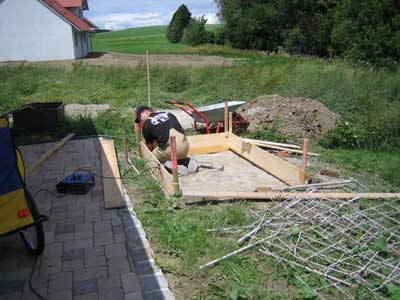
As a next step there was the shuttering of the base plante.
Don't forget to insert structural steel
(It can be a second hand steel, too)
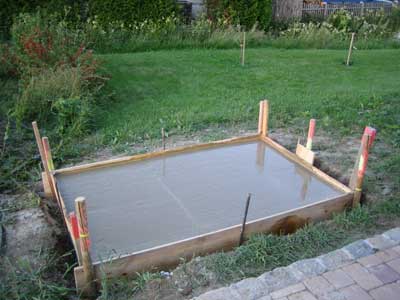
Here's the base plate. 20 cm thick and strongly reinforced
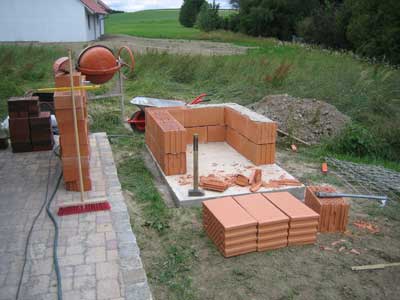
Floor slab has cured. Tiles are aligned and I'm ready to
start working on the walls
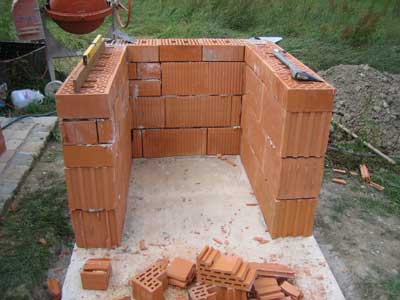
The final height of the substructure was quickly reached.
But the all-important archis still missing...
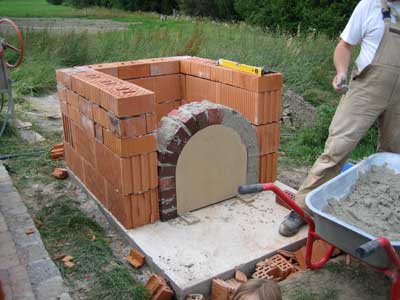
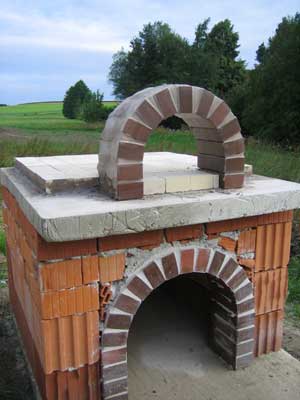
There it is: the round arch. Although I was quite afraid of this
building step, it has proven over the course of the work to be fairly
simple.
Important: The length of the outer side must exceed the length of clinker by about 2 cm!
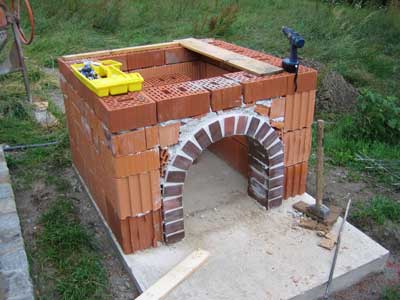
Et voila! just fill in the gaps to the must-have height
and align it carefully.
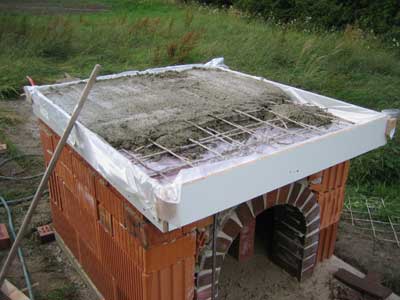
A short hop across a couple of steps.
You can see the formwork with reinforcing the false ceiling.
Just do it all similar to the base slap.
The edges of the formwork were exactly aligned with the bubble
and concrete was inserted, until it ran over the border. Then simply pull off with a long aluminum track and smoothen it.
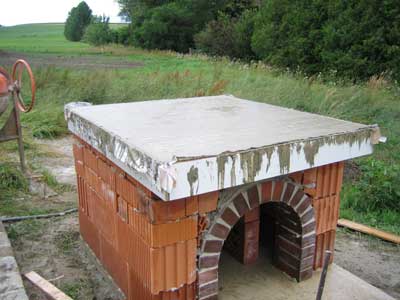
Let the concrete harden for at least 3 days.
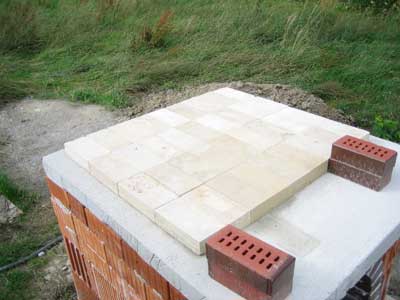
So lets start with the bottom of the oven! For this I have used fire clay brick. These small bricks are
cheaper to the square times than the big boards.
And again a big step further: The second form is done (again with template)
and the clay bricks are fixed to the false ceiling
Make it sure: lattice braid!
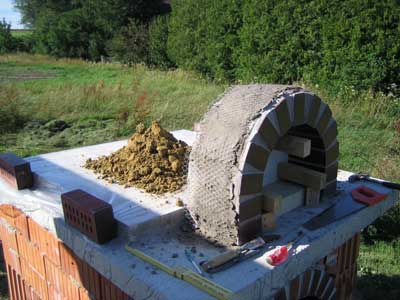
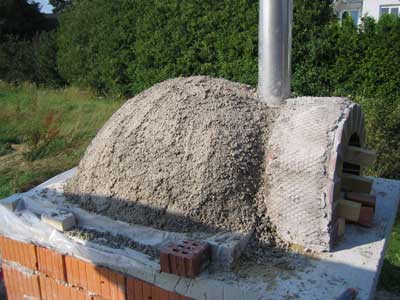
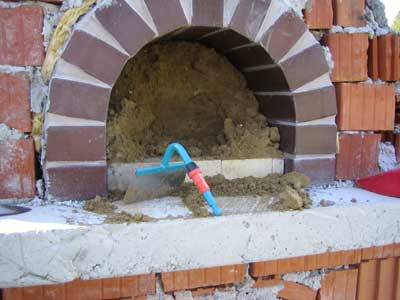
Now its time for the crucial construction phase. The internal
shape of the furnace is formed of sand as a negative. Background:
I do not want a tube oven, but a real dome. And whoever wants to make a
joke on a bricklayer, ask him whether he can make a dome of that
size out of bricks.
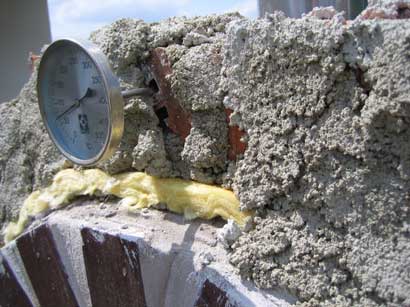
It took me about 3 days until the negative was done out of sand. That's
worth it, because it was as smooth as a baby's back... Just take any
kind of sand, don't be so freaky as I was and search for weeks for the
right sand. Ah yes, on the picture you'll see a trophy from
Alfonso: A lance thermometer to 500 degrees celsius. By the way:
It must not be the expensive one, just buy the complete manual to check
out a much cheaper way!
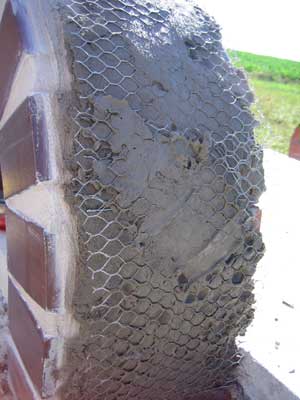
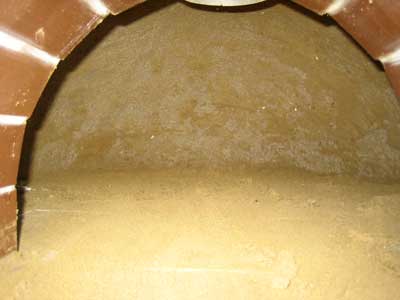
The inner shell: fireclay concrete. The mass is carefully
drawn by hand on the sand and compacted with wire.
After the concrete gets hard hydraulically , I have kept it
wet for 24 hours. After 2 days of hardening I made a second
layer of chamotte concrete inserting the wire net, too.
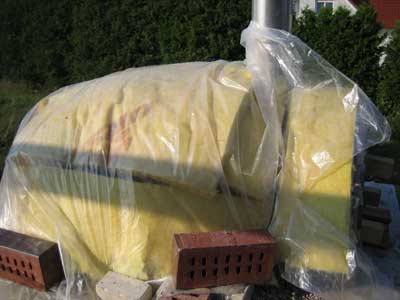
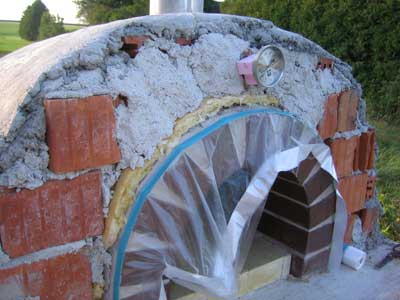
A couple of days and talks later (Thanks Geoffrey!) I inserted an
insulating layer of glass wool between the
inner and outer shell covering - meanwhile I'm better informed:
Please use Rockwool!
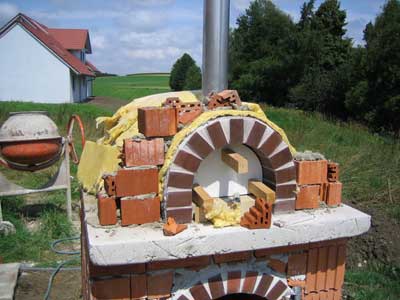
Now it's getting bizarre: The front of the oven is supposed
to be plastered. So get some stones in row to get a clean frontwall.
After the insulation has been incorporated, I have no doubts that
the concrete (not fireproof) tears.
So always gently bring up layer by layer by hand.
The thermometer is installed in this step. I have protected it
with a Pad in front of the concrete, so I can exchange it at any time.
Incidentally, the thermometer is pointing in the oven-tube!
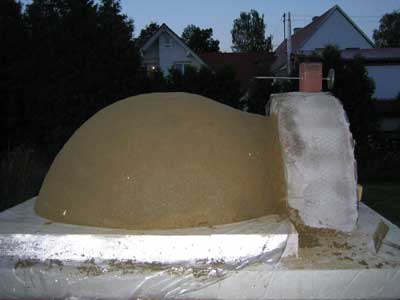
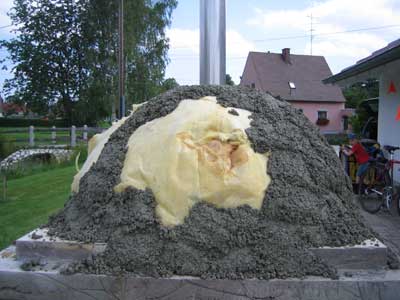
The 1st part of the outer shell has hardened.
It is followed by a second layer, which already reflects
the final form of 99%.

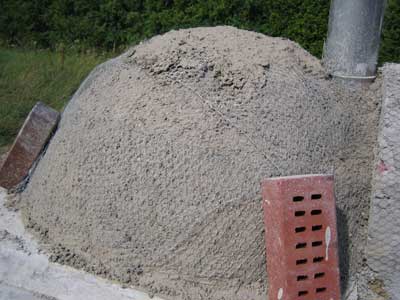
The last layer of concrete with a lot of sandand made
well wet. You can get a real glimpse of the final form.
For long I've been looking forward to this day and was fightend the
same way. After I've really spent a lot of concrete for the shell,
there was so much weight on the sand hills in the interior that I could
only hope for the statics of the dome ...
Managed to keep the inner! The rest of the sand
is removed the best way with a vacuum cleaner from the
combustion chamber.
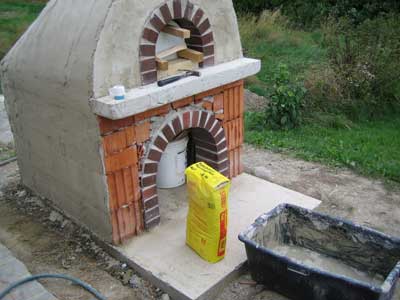
Tidy up! To make you beautiful: the front end
indeed is lacking - which adds an additional
concrete before plastering. Cover the hard polished clinker!
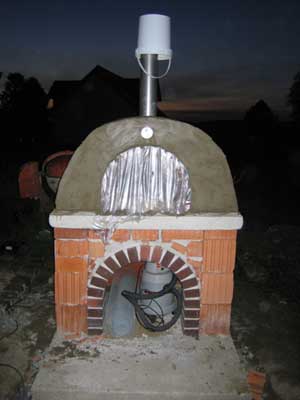
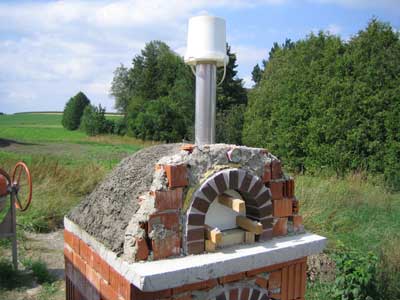
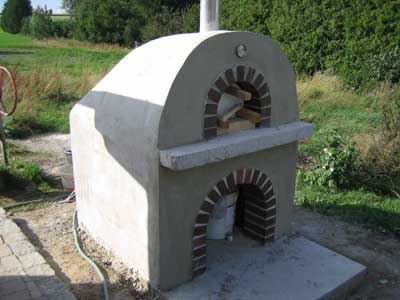
26.7.2007 - more than a month after the start of construction:
"Facade" almost done. I will look for good wood.
For the curing and heating - I scheduled all in all two and a half weeks.
In mid-August, I probably go to full load.
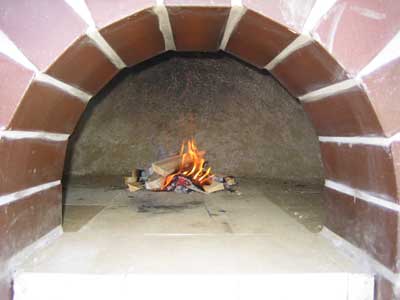
FIRE!! I couldn't wait any longer. On
27.7. I heated up very carefully!
Maximum of 180-200 degrees for about a 3 / 4 hours.

And he smokes well. After my oven has passed the baptism of
fire I can care about the outer shape.
My oven swallows 3 packs of outer plaster. In particular, the
upper arch, I plastered with devotion - the edges are pretty difficult
to draw without steel coating...
Now my furnace scored his garment. I chose the heating
phase every 3-4 days, the plaster is still whitewashed and not later
than mid-August, I will insert a Pizza for the first time. Update
2.8.07: furnace was the third time
heated for 1 hour at 250-300 degrees.
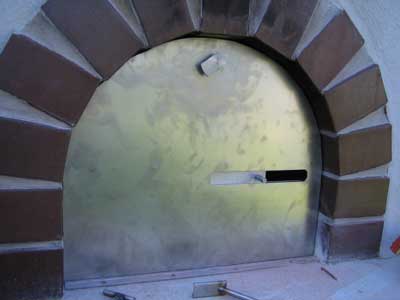
Blessed is the one who calls a metalworker his friend. My fried
Harry has welded the oven door. Patent pending (almost)!
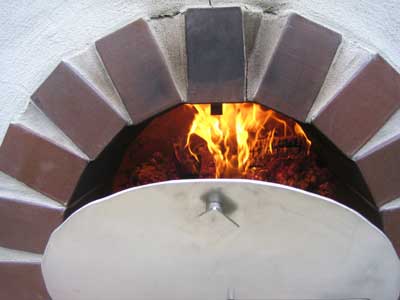
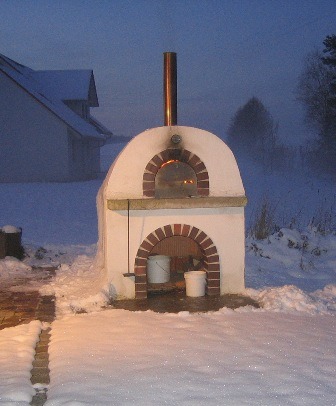
Heart, what more do you want? Cozy heat (450 ° C) and a
Pizza, like in Bella Italia, perhaps even a bit better
(... at least say so my guests).
The first way, there's pizza on 14.08.2007
-approximately 7 weeks after breaking ground.
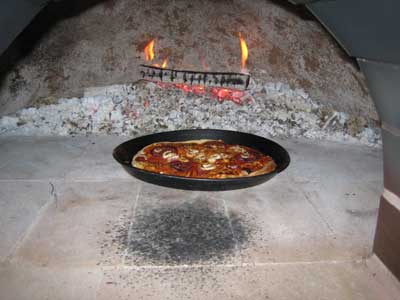
I tried hard to get the "real Pizza", with big sucess
Dough perfectly, perfectly seasoned coating.